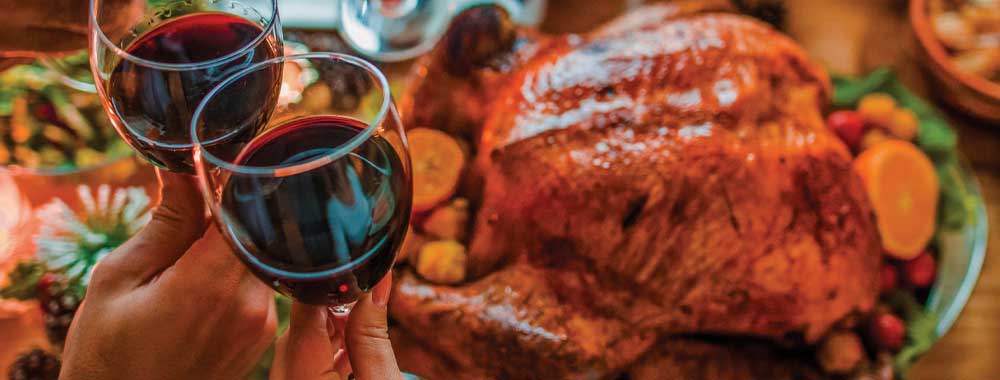
A sweet way to gather with family and friends

By Jennifer Huberdeau
If you’re like the rest of us, the holidays are not only the “most wonderful time of the year,” they’re also the busiest. There’s shopping to do, presents to wrap, meals to plan, family and friends to visit, parties to attend, decorations to be put up and cookies to bake.
If you’re looking for a creative way to spend more time with family and friends, you might want to host a cookie swap. It’s a fun way to spend some quality time with others and bring home delicious treats to share with your loved ones.
What’s a cookie swap, you ask? It’s a great way to ensure that you have dozens of cookies, and a variety of them, on hand at the holidays. And the best part? You only have to make one type.
Traditionally, the host of the cookie swap invites 10 to 15 people to participate. Each guest brings a specific number of cookies to the party. The host determines how many dozen cookies participants bring, but typically, six dozen is the rule.
At the end of the party, each guest goes home with the same number of cookies they arrived with, but instead of just one kind on their platter, they have a sampling of every cookie that was at the party.
If you’ve never attended a cookie swap or exchange, the idea of making six dozen cookies might seem like an insurmountable task. Or, you might think that your contribution needs to be a masterpiece with meticulously piped frosting and perfect icing that’s dusted with colorful sanding sugar that glistens when the light hits it just right. It doesn’t.
To put your mind at ease, we sought out a few experts — Brandi Scalise, a Pittsfield, Mass., resident and author of “Cookie Classics Made Easy”; Charlotte Rutledge, King Arthur Flour’s recipe testing and development manager; and Gesine Bullock-Prado, cookbook author, host of “Baked in Vermont” on Food Network, and pastry and baking instructor at Sugar Glider Kitchen, a baking school she runs in Hartford, Vt. — for cookie-making advice for bakers of every level.
Q: What cookies work best for a cookie swap?
Bullock-Prado: Family recipes are my favorite cookie swap contributions because they are meaningful and introduce your friends to a bit of your history. They don’t need to be fancy, just delicious.
Rutledge: Refrigerator cookies/slice-and-bake — you’ll get a lot of cookies out of one batch of dough, and you can make swirl, checkerboard and other patterns with two different colored/flavored doughs, so they’ll look pretty, too.
And thumbprints are always popular. Whether they are the peanut butter with a chocolate kiss in the middle or the jam-filled ones, those are fairly easy to execute, too.
Q: What types of cookies would you suggest a novice baker make for a swap? For a baker looking for a bit of a challenge?
Bullock-Prado: Novice bakers should steer toward drop cookies. They tend to be more forgiving and less prone to being overworked. Macarons are always great for bakers in need of a challenge. I also suggest florentine.
Scalise: I say, keep it simple. I like one-bowl recipes that make large batches. I also don’t read directions, I just start with the wet ingredients and mix them and then add the dry ingredients. I don’t mix them separately. In the end, it all comes out great. People shouldn’t be scared and intimidated by making a cookie.
Rutledge: I think the slice-and-bake option is great for a novice. Drop cookies are also a good choice, but are maybe less festive-looking.
For more of a challenge, stamp cookies would really up your game. Stamp cookies — those made with a cookie stamp/press — have become really popular lately. They require a little more effort, but you can get really pretty cookies without having to go the icing decorating route.
Q: When attending a cookie swap or just gifting cookies, what is your go-to cookie?
Rutledge: My new holiday cookie favorite is the Hot Cocoa Cookie [see recipe]. They’re a type of thumbprint cookie, easy, and super chocolatey. I’m also a huge fan of shortbread. You can bake them in many different shapes. Many of [King Arthur’s] recipes have you bake the dough in a round cake pan, then cut wedges while still warm, for nice, sharp edges.
Bullock-Prado: I am a fan of butter cookies, German butter cookies, specifically. I developed a browned butter cookie [see recipe] that I adore for its simplicity and its deliciousness.
Scalise: Winter in the Berkshires [see recipe] is great for a cookie swap. It’s a fun spin on a mint chocolate chip cookie. It’s like an adult version of the Girl Scout’s thin mint cookie.
Q: What are the most common mistakes people make when baking cookies? How can they avoid it?
Scalise: I find a lot of people are intimidated by baking in general. They’re scared they are going to mess up the recipe, so they don’t try. I literally just throw stuff in the mix. If you put extra baking soda in, keep going — it’s going to put a little bit more air in the mix, but it’s not going to destroy your cookies.
Rutledge: The spacing of unbaked cookies on a baking sheet can throw people off, particularly for scoop and drop cookies, which tend to spread into one another. I like to stagger my cookies on the pan to be able to get more on the pan while avoiding them baking into one giant, mis-shapen cookie.
Bullock-Prado: Overmixing the dough is the biggest sin. Once you add flour, stop just before it’s completely incorporated. That means the dough will look a bit piecey, with some flour flecks that are unincorporated. Because most doughs are chilled before baking, when you transfer doughs to plastic wrap to chill, you can gently fold the dough over to incorporate any loose flour. This ensures a tender, not a tough, finished cookie. Remember, it’s not just the mixing stage where you can overwork the dough. When you roll out cookie dough, you’re also working the dough, i.e. creating gluten. Be gentle from the get-go and you’ll have perfect cookies.
Q: Any tips for frosting cookies?
Bullock-Prado: Practice piping with royal icing on parchment to get a feel for different techniques and consistencies. Outline piping and flooding aren’t that hard to master once you get a sense of the right consistency for both. Having a few piping bags and piping tips makes your work neater as well.
Q: For our readers that have had a bad experience when baking cookies, burnt edges and the like, what advice would you give them?
Scalise: Everyone’s oven is different. You’re going to start smelling the cookies when they are almost done. When that happens, go check them, as they are probably going to be done. Remember, you know how you like your cookies; my mother likes them crunchy and leaves in [a little longer], but I take them out right away.
Rutledge: Bake in the middle of the oven, one pan at a time. Home ovens are extremely variable, so, unless you know where your ovens hot spots are and whether it has top or bottom (or both) heating elements, it can be hard to get consistency across two pans of cookies baking at the same time.
Q: Any tips for our cookie swap hosts and participants that will make it a little less stressful?
Bullock-Prado: You don’t want to commandeer your participants’ baking experiences, but you do want to ensure that there’s a variety of cookies to swap, so I’d put a helpful list of different types of cookies in the invitation to give your guests some inspiration.
Scalise: Cookie cutouts are great and easy. You spread the cookie dough out over the whole pan, bake until the edges are golden brown and then cut into bars or cut out shapes with cookie cutters. From there, you can decorate them how you want.
Rutledge: Bar cookies are often overlooked. They are a quick and easy way of getting a lot of cookies in a single bake, and you can use cookie cutters to cut them into festive shapes (just be sure your cutter is thick enough to cut through the whole bars).
Tips for hosting a cookie swap

(Adapted from “Cookie Craft Ideas” by Valerie Peterson and Janice Fryer and published by Storey Publishing.)
GETTING READY
Establish how many cookies each person should bring. (At The Berkshire Eagle’s annual cookie swap, everyone brings six dozen cookies and a “few extras” for snacking.)
Include this information on the invitation, and ask everyone to let you know what kind of cookies they are bringing to the swap.
Remind guests to bring copies of their recipes. They should bring enough copies for each guest attending the swap.
You’ll either need to provide containers for each person to take home their cookie loot or tell those participating to bring extra containers of their own. Decorative tins or boxes can serve as party favors.
Provide snacks and drinks so those attending won’t be tempted to eat all the cookies they’re supposed to bring home. (This is where the “few extras” come in.)
PARTY TIME
Arrange all the cookies on a table, with copies of the respective recipes near each.
Let everyone know how many cookies to take of each variety on the table. To figure this out, divide the number of cookies each person has brought by the number of participants. If each person brings six dozen cookies (72) and 15 people attend, each person takes home four of each variety. (72 divided by 15 equals 4.8) You’ll have a few cookies of each variety left over. Extra cookies can be split between the guests (someone always wants to take home one or two more of their favorite type) or eaten on the spot.
HOT COCOA COOKIES

Recipe courtesy of King Arthur Flour and kingarthurflour.com
The holidays are for family, giving and chocolate. At least that’s what I’ve always known them to be. This recipe, made with premium hot chocolate mix, studded with semisweet mini chips and topped off with a bittersweet disc, is a tribute to those indulgent traditions.
— Charlotte Rutledge, King Arthur Flour recipe testing and development manager
Yield: About 5 ½ dozen
INGREDIENTS
- Cookies
- 1/2 cup unsalted butter, at cool room temperature
- 1/2 cup King Arthur hot chocolate mix*’
- 1/3 cup light brown sugar
- 1 teaspoon baking powder
- ½ teaspoon salt
- 1 teaspoon espresso powder, optional, for enhanced flavor
- 1 large egg
- 1 teaspoon vanilla extract
- 1 ¼ cups King Arthur unbleached all-purpose flour
- 1 ½ cups mini chocolate chips
- 1/2 cup cocoa nibs, optional
- Topping
- 5 ½ dozen Belcolade bittersweet discs, or other high-quality chocolate wafer peppermint crunch, cocoa nibs, or chopped nuts, for garnish
DIRECTIONS
Preheat the oven to 375 F. Lightly grease two baking sheets, or line with parchment.
To make the cookies: Combine the butter, hot chocolate mix, brown sugar, baking powder, salt and espresso powder in a mixing bowl. Beat until mixture is smooth.
Add the egg and vanilla, and beat until thoroughly combined.
Weigh your flour; or measure it by gently spooning it into a cup, then sweeping off any excess. Add the flour to the cookie mixture, stirring to combine.
Mix in the chips and cocoa nibs.
Drop the dough by teaspoonfuls onto the prepared baking sheets — a teaspoon cookie scoop works well here. Space the cookies at least 2 inches apart.
Bake the cookies for 8 to 9 minutes, until the surface is set but the cookies aren’t quite fully baked.
Take the cookies out of the oven and press a chocolate disc into the center of each cookie.
Return the cookies to the oven for 1 to 2 minutes longer, until the chocolate begins to turn shiny and softens.
Remove the cookies from the oven once again, and sprinkle the melted chocolate disc with your garnish of choice.
Allow the cookies to cool on the baking sheet until the chocolate discs are set.
Store well-wrapped cookies at room temperature for a week or so; freeze for longer storage.
*King Arthur’s hot cocoa mix is a proprietary blend of sugar, ground chocolate, dry milk and cocoa powder. If you’d like to use a store-bought hot chocolate mix, it’s recommended trying to find one with a similar list of ingredients.
WINTER IN THE BERKSHIRES

Excerpted from “Cookie Classics Made Easy” by Brandi Scalise. Used with permission from Storey Publishing
This cookie makes Brandi Scalise think of standing outside in the middle of winter with a candy cane in a cup of hot chocolate.
Yield: 3 dozen
INGREDIENTS
- 1 ¼ cups (2 ½ sticks) butter, room temperature
- 4 candy canes, broken into bits, or ¼ cup peppermint stick bits
- 1 ½ cups firmly packed light brown sugar
- 2 eggs
- 2 teaspoons baking powder
- ½ teaspoon salt
- 1 tablespoon peppermint extract
- 2 tablespoons of milk
- 2/3 cup Hershey’s Special Dark unsweetened cocoa powder
- 2 cups all-purpose flour
- ½ cup white chocolate chips
- 2 cups semisweet chocolate chips
DIRECTIONS
Preheat oven to 350 F. Line one cookie sheet with parchment paper.
Combine the butter and peppermint candy in a large mixing bowl and beat, preferably with an electric mixer. Add the brown sugar, eggs, baking powder, salt and peppermint extract. Mix well, occasionally scraping the sides of the bowl. Add the milk, cocoa powder, flour, white chocolate chips and semisweet chocolate chips and mix until well combined.
Using a 1-inch cookie scoop or a rounded teaspoon, scoop out the dough and drop 1 inch apart on the parchment-lined cookie sheet.
Bake for 15 to 17 minutes, until you can smell a wonderful chocolate aroma filling the air. Let cool on the cookie sheet for 5 to 10 minutes, then transfer to a wire rack and let cool fully.
THE VERMONT
Excerpted from “Cookie Classics Made Easy” by Brandi Scalise. Used with permission from Storey Publishing
This chewy cookie is filled with all the rich maple flavor you would expect from a cookie called Vermont.
Yield: 3 ½ dozen cookies
INGREDIENTS
- 1 cup (2 sticks) butter, room temperature
- 1 ½ cups firmly packed brown sugar
- 1 egg
- 2 teaspoons baking powder
- ½ teaspoon salt
- 1 tablespoon maple extract
- 1 tablespoon pure maple syrup
- 2 ½ cups all-purpose flour
- 1 cup chopped walnuts (optional)
DIRECTIONS
Preheat the oven to 360 F. If you’re not using nonstick cookie sheets, line them with parchment paper.
Combine butter, brown sugar, egg, baking powder, salt, maple extract and maple syrup in a large mixing bowl. Mix well, preferably with an electric mixer, occasionally scraping the sides of the bowl. Add the flour and mix until well blended. Add the walnuts, if using, and mix again until well blended.
Using a 1-inch cookie scoop or a rounded teaspoon, scoop out the dough and place about 1 inch apart on the cookie sheets.
Bake for 15 to 17 minutes, until the edges are darker in color. Transfer to a wire rack and let cool.
MINT DOUBLE CHOCOLATE CHIP
Excerpted from “Cookie Classics Made Easy” by Brandi Scalise. Used with permission from Storey Publishing
In the mood for a Girl Scouts Thin Mint cookie? This is the adult version of the classic.
Yield: About 3 dozen
INGREDIENTS
- 1 cup (2 sticks) butter, room temperature
- 1 cup granulated sugar
- ½ cup firmly packed dark brown sugar
- 2 eggs
- 1 teaspoon vanilla extract
- 1 tablespoon mint extract
- ¼ teaspoon salt
- ½ teaspoon baking soda
- 2/3 cup Hershey’s Special Dark unsweetened cocoa powder
- 2 cups all-purpose flour
- 2 cups semisweet chocolate chips
- 1 cup powdered sugar
DIRECTIONS
Preheat the oven to 375 F. If you are not using nonstick cookie sheets, line them with parchment paper.
Combine the butter, granulated sugar, brown sugar, eggs, vanilla, mint extract, baking powder, salt and baking soda in a large mixing bowl. Mix well, preferably with an electric mixer, occasionally scraping the sides of the bowl. Add the cocoa powder, flour and chocolate chips, and mix well again.
Using a 1 ½-inch cookie scoop or a large rounded teaspoon, scoop out the dough and roll it between the palms of your hands into balls. Roll the balls in the powdered sugar, then place about 1 inch apart on the cookie sheets.
Bake for 13 to 15 minutes, until you can smell a wonderful chocolate aroma filling the air. Transfer cookies to a wire rack and let cool
BROWN BUTTER-BROWN SUGAR COOKIES

Recipe courtesy Gesine Prado and gbakes.com
Yield: 30 cookies
INGREDIENTS
- 1 cup unsalted butter, room temperature plus 2 tablespoons
- 1 cup dark brown sugar, packed
- 1 large egg
- 1 large egg yolk
- 1/4 cup sweetened condensed milk
- 1 tablespoon vanilla bean paste or extract
- 3 cups all-purpose flour
- 1 teaspoon salt
DIRECTIONS
In a large saucepan, melt the cup of butter over low heat. Continue cooking the butter until it simmers, starts to brown and gives off a nutty aroma. Carefully pour the melted butter into a small container, leaving as much of the brown bits on the bottom of the pan behind. Immediately add the reserved 2 tablespoons of butter and allow to melt into the body of the brown butter. Stir and refrigerate to solidify, about an hour.
Combine the solidified brown butter and brown sugar in the bowl of a stand mixer fitted with the paddle attachment. Mix on high until light and fluffy. Add the egg and egg yolk, mix to combine.
Scrape down the bottom and sides of the bowl. Add the sweetened condensed milk and vanilla. Mix to combine. Add the flour and salt all at once and mix until just combined.
Transfer the dough to a sheet of plastic wrap and press into a disk. Cover completely and refrigerate for 20 minutes.
Line a few sheet pans with parchment. Preheat oven to 350 F.
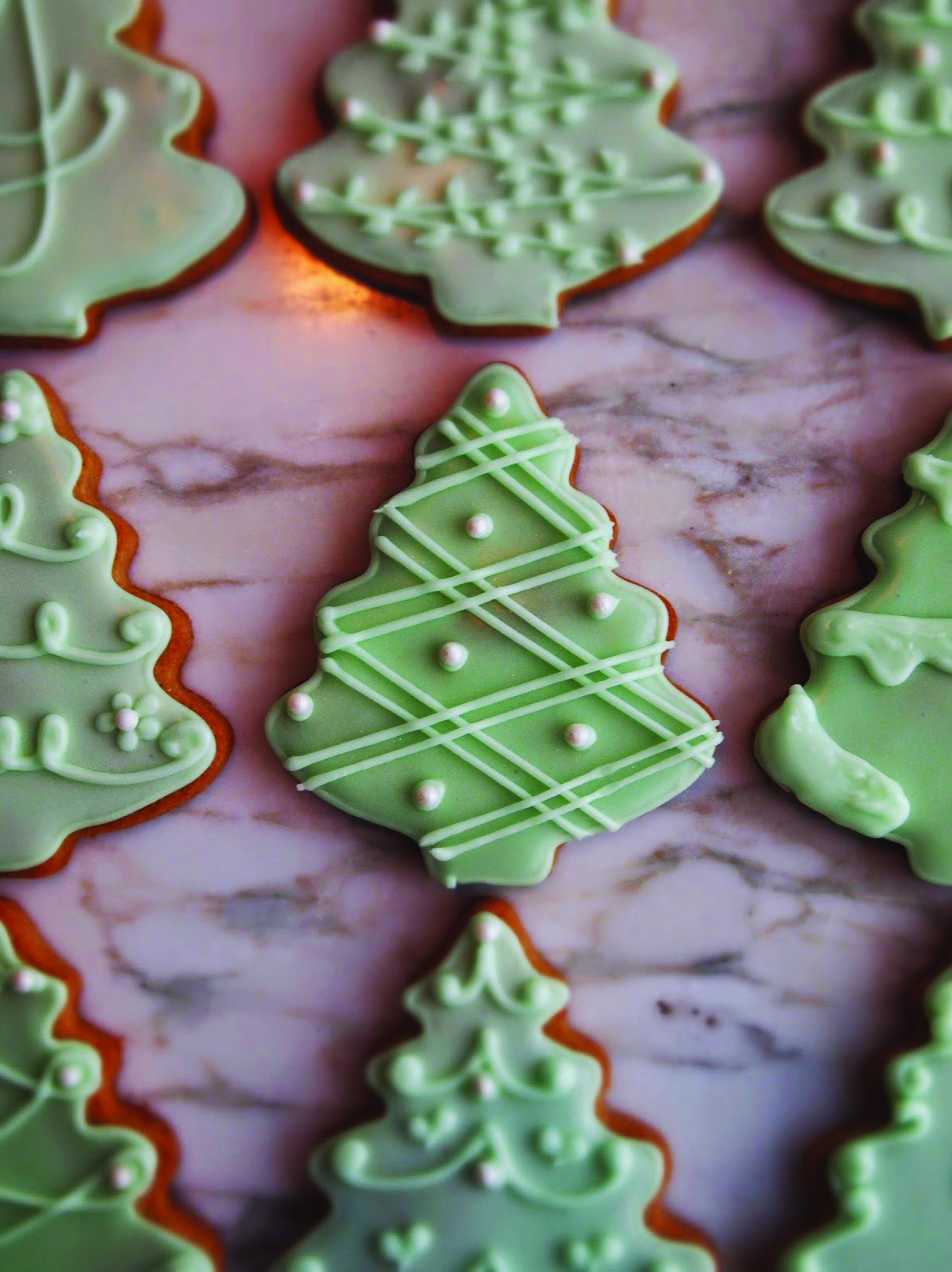
Lightly flour your work surface and roll the dough to between ⅛-inch and ¼-inch thick. Stamp out shapes — I, obviously, chose a tree — and place it on a parchment-lined sheet pan about an inch apart.
Bake for 10 minutes, turn the sheet pan 180 degrees and bake for 5 to 10 minutes more, or until the edges of the cookies start to brown. Allow the cookies to cool completely.
ROYAL ICING
Yield: Makes approximately ½ cup
- 2 cups confectioner’s sugar
- 1 ½ teaspoons powdered egg whites
- Gel food coloring
For piping:
Whisk together the confectioner’s sugar and egg white powder. Add water and just a touch of dye, add water 1 teaspoon at a time, until you create an icing with an almost pastelike consistency that, when piped from a small open tip, keeps its shape. Stir well so that there are no lumps, but don’t stir so much that you aerate the icing.
Fill a pastry bag with a small open tip with the royal icing. Use a piece of baker’s twine to tightly close the bag up top to keep the icing from crusting inside the bag.
(TIP! Place a damp paper towel at the bottom of a tall glass. Whenever you take a break from piping, place the bag and tip in the glass, tip touching the paper towel, to keep the tip from crusting over)
Outline each cookie and allow the royal icing to crust over about 30 minutes.
This is also the consistency of icing you’ll use for piping decorations on top of the cookie.
For flooding:
The ingredients are the same as for piping, but add enough water that the icing spreads. It should have the consistency of ketchup.
When flooding, have a toothpick handy to push the icing into corners. You can use a pastry bag with a slightly larger open tip than for piping. Allow the flooded cookies to set. This can take much longer than you’d like, usually a few hours.
PISTACHIO CRANBERRY ICEBOX COOKIES
Recipe courtesy of Robin Anish
This is a good cookie recipe for Christmas. The flavors are right, and the dough can be made way ahead of time.
INGREDIENTS
- 1 ½ cups flour
- ½ teaspoon cinnamon
- ¼ teaspoon salt
- 1 ½ sticks butter (¾ cup) unsalted butter, softened
- 6 tablespoons granulated sugar
- ½ teaspoon freshly grated orange zest
- ½ cup shelled, unsalted pistachio nuts, coarsely chopped
- 1/3 cup dried cranberries, coarsely chopped
- 1 large egg, well beaten
- ¼ cup coarse sugar
DIRECTIONS
Whisk together flour, cinnamon and salt.
In a mixing bowl, use an electric mixer to cream butter, sugar and zest until light and fluffy.
On low, gradually add flour mixture until dough comes together in clumps. Dough will be stiff. Add pistachios and cranberries and mix to work throughout the dough.
Press dough together then cut into two equal pieces. Form each half into a log about 1 1/2 inches in diameter. Wrap each log in wax paper or plastic and refrigerate until very firm, about 2 hours.
To bake, preheat oven to 350 F.
Brush beaten egg wash over logs on all sides. Spread coarse sugar on a piece of wax paper or plate and roll logs in sugar to coat well.
Cut each bar crosswise into ¼-inch-thick slices. Arrange cookies an inch apart on ungreased or parchment-lined baking sheets. Bake 10 to 12 minutes, or until lightly golden.
Cookie dough logs can be made ahead of time and frozen.